Construction Techniques & Methods

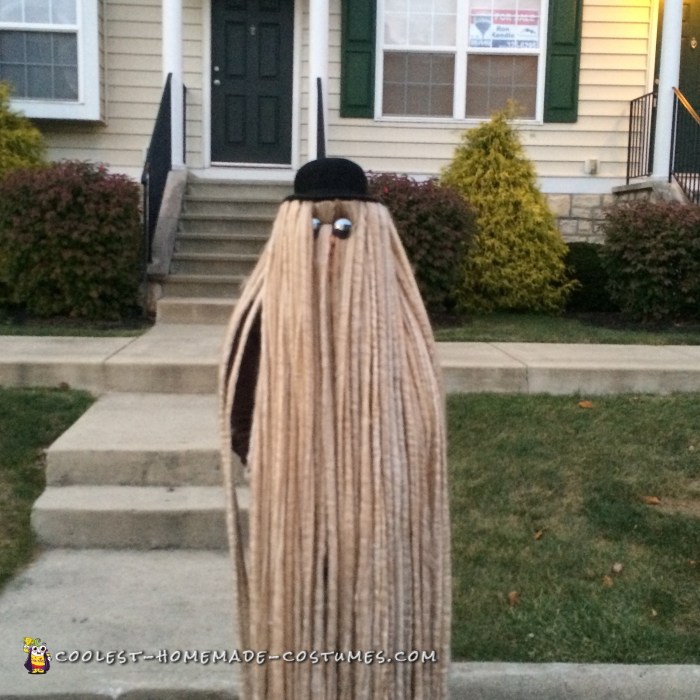
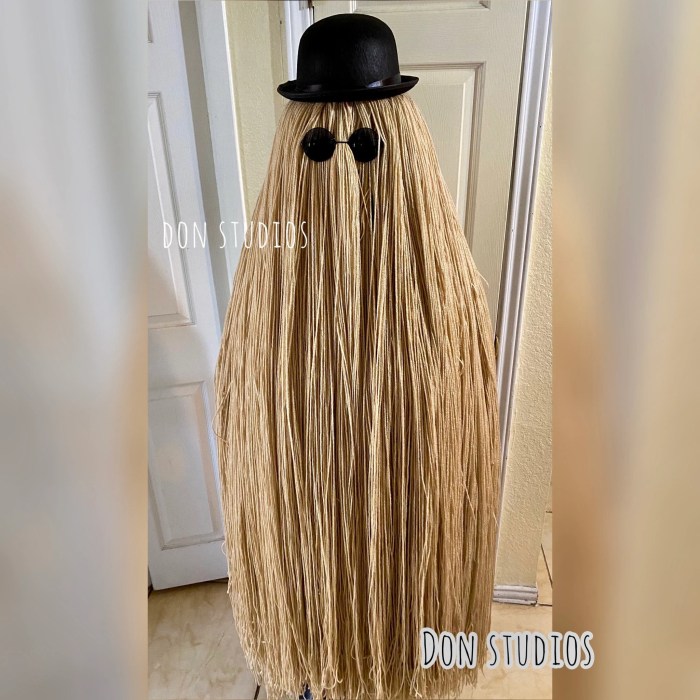
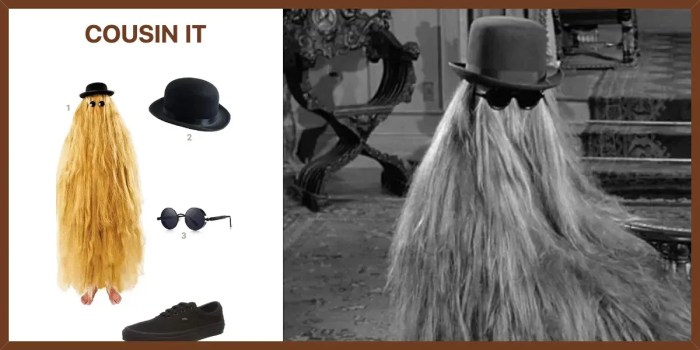
Diy cousin it costume – Creating the ultimate Cousin Itt costume requires meticulous attention to detail, especially the iconic wig. This section details three distinct methods for constructing the wig, followed by a step-by-step guide for the rest of the costume. Each method offers a unique balance of cost, time commitment, and aesthetic result.
Cousin Itt Wig Construction Methods
Choosing the right method for your Cousin Itt wig depends on your budget, available time, and desired level of realism. Below, we detail three approaches: using yarn, fabric strips, and repurposed materials.
Yarn Wig Construction
This method provides a full, textured wig with a relatively natural look.
- Step 1: Gather Materials. You will need several skeins of brown yarn (various shades for depth), a wig cap, a strong adhesive (hot glue gun recommended), and scissors.
- Step 2: Prepare the Wig Cap. Securely place the wig cap on a styrofoam head or similar form. This provides a stable base for attaching the yarn.
- Step 3: Attaching the Yarn. Apply hot glue to small sections of the wig cap and immediately attach clumps of yarn, varying the lengths for a more natural look. Work in sections, ensuring complete coverage.
- Step 4: Adding Depth and Texture. Once the base layer is complete, add shorter strands of yarn to fill in gaps and create a fuller, more textured appearance. Use different shades of brown to add dimension.
- Step 5: Trimming and Shaping. Once the glue is dry, carefully trim any stray or uneven strands to achieve the desired shape and volume.
Advantages: Relatively inexpensive, readily available materials, achieves a full and textured look. Disadvantages: Time-consuming, can be messy, requires precision in glue application to avoid burning oneself.
Fabric Strip Wig Construction
This method offers a more controlled and potentially less time-consuming approach compared to using yarn.
- Step 1: Gather Materials. You will need several yards of brown fabric (felt or a similar material works well), a wig cap, scissors, and a needle and thread.
- Step 2: Cut Fabric Strips. Cut numerous strips of fabric, varying widths and lengths for texture and volume. Consider using different shades of brown for depth.
- Step 3: Attaching the Strips. Securely attach the fabric strips to the wig cap using a needle and thread, working in sections and layering the strips for fullness. Overlap the strips slightly for a cohesive look.
- Step 4: Adding Volume. Layer the strips to build volume. Consider using multiple layers to create a thick and textured wig.
- Step 5: Trimming and Shaping. Once all strips are attached, carefully trim any uneven ends to achieve a uniform and full look.
Advantages: More controlled than the yarn method, potentially faster, cleaner application. Disadvantages: Requires more fabric, may not achieve the same level of natural texture as yarn.
Repurposed Material Wig Construction
This eco-friendly approach utilizes readily available materials.
- Step 1: Gather Materials. Collect various lengths of brown rope, twine, or similar materials. A wig cap, hot glue gun, and scissors are also needed.
- Step 2: Prepare the Wig Cap. Securely place the wig cap on a styrofoam head.
- Step 3: Attaching the Materials. Apply hot glue to small sections of the wig cap and attach pieces of rope or twine, varying lengths for a textured look. Overlapping is key for a full appearance.
- Step 4: Building Volume and Texture. Continue adding material until the wig cap is fully covered. Experiment with layering and overlapping for a unique, Cousin Itt-esque texture.
- Step 5: Trimming and Shaping. Once the glue is dry, trim any uneven ends for a polished finish.
Advantages: Environmentally friendly, uses inexpensive or readily available materials, unique texture. Disadvantages: Can be difficult to achieve a perfectly uniform look, may be less comfortable than yarn or fabric.
Cousin Itt Costume Body Construction, Diy cousin it costume
Creating the rest of the Cousin Itt costume is straightforward. This table Artikels the process:
| Step Number | Action | Materials Needed | Tips/Troubleshooting |
|---|---|---|---|
| 1 | Choose a base outfit. | Oversized, dark-colored clothing (shirt, pants, possibly a vest) | Consider using layers for added bulk. |
| 2 | Add texture. | Burlap, old rags, or other textured fabric scraps. | Securely attach the fabric scraps to the base outfit using glue or stitching. |
| 3 | Create a ragged look. | Scissors | Cut and fray the edges of the fabric scraps for a more disheveled appearance. |
| 4 | Accessorize. | Dark-colored shoes, gloves (optional). | Consider adding accessories like a walking stick or a small, worn satchel. |
Accessory Creation

Transform your Cousin Itt costume from good to truly unforgettable with these creative accessory ideas. We’ll explore options for hands, feet, and other quirky details to complete your wild look. Remember, the more eccentric, the better!
Rocking a DIY Cousin It costume this Halloween? It’s all about that wild, shaggy hair! For more killer DIY ideas, check out this awesome guide on diy halloween costumes teens for tons of inspiration. You can adapt many of those creative techniques to perfect your Cousin It look, adding extra layers and texture for ultimate spooky effect.
Cousin Itt Hand Options
Crafting Cousin Itt’s hands requires careful consideration of both visual impact and ease of construction. Three distinct approaches offer varying levels of complexity and realism.
- Option 1: Simple Glove Hands: Use brown or black gloves, stuffing them generously with polyester fiberfill to create a bulky, hairy effect. This method is incredibly simple and quick, ideal for a last-minute costume. The visual effect is somewhat basic, lacking the intricate detail of other options.
- Option 2: Yarn-Wrapped Hands: Start with inexpensive gloves (again, brown or black are best). Wrap them tightly with various shades of brown and black yarn, securing with hot glue as you go. This technique allows for greater control over texture and hair density. The construction is moderately complex, requiring patience and precision, but the result is a significantly more realistic and detailed hand.
- Option 3: Sculpted Hands: For the most realistic effect, create hands from a flexible sculpting material like air-dry clay. Once dry, paint them with a base color and then meticulously apply individual strands of yarn or even real hair to simulate the Cousin Itt look. This is the most time-consuming and complex method, requiring sculpting skills, but offers unparalleled realism.
Cousin Itt Footwear Options
The footwear is just as crucial as the rest of the costume. These three options provide diverse approaches to crafting Cousin Itt’s unique shoes.
- Option 1: Oversized Fuzzy Slippers: Find oversized, brightly colored slippers and generously cover them with faux fur or shaggy yarn in shades of brown and black. This is a simple and effective approach, offering a comfortable and visually appealing result. The construction is straightforward and requires minimal skill.
- Option 2: Yarn-Wrapped Boots: Use sturdy boots as a base (preferably old ones you don’t mind covering). Wrap them completely with thick yarn, using a variety of brown and black shades to create depth and texture. Secure the yarn with hot glue. This method is more time-consuming than using slippers, but offers a more robust and visually interesting result. Consider adding small bells to the yarn for an added auditory effect.
- Option 3: Custom-Made Boots: For the ultimate in detail, consider creating custom boots from felt or a similar material. Cut and shape the felt to create the boot form, then painstakingly attach individual strands of yarn or faux fur to create the hairy texture. This is the most advanced option, requiring advanced crafting skills, but the final product will be truly impressive.
Additional Cousin Itt Accessories
These accessories add the final touches to your incredible Cousin Itt transformation.
- Glasses: Use round, wire-rimmed glasses and attach small, fluffy yarn tufts to the frames to blend them seamlessly into the overall hairy aesthetic.
- Hat: A top hat is a classic Cousin Itt accessory. Cover a standard top hat with brown or black felt and then attach yarn or faux fur to create a hairy texture that matches the rest of the costume. Consider adding small, decorative feathers.
- Cane: A wooden cane provides an iconic prop. Wrap it with yarn in a similar fashion to the hands or feet, adding small bells for a whimsical touch.
Budgeting and Sourcing Materials: Diy Cousin It Costume

Creating a truly terrifyingly awesome Cousin Itt costume can be achieved on various budgets, from thrifty to extravagant. The key lies in smart sourcing and creative repurposing of materials. This section details three budget options, highlighting material sources and cost breakdowns to help you craft the perfect Cousin Itt for your Halloween adventure.
Budget Option Breakdown
This section Artikels three distinct budget options for your Cousin Itt costume, ranging from a budget-conscious approach to a more lavish creation. Each option includes a detailed cost breakdown to aid in your planning.
Low-Cost Cousin Itt (Under $30)
This option prioritizes resourcefulness and repurposing existing items. The overall aesthetic might be slightly less refined, but it still captures the essence of Cousin Itt.
- Wig: Use a dark brown or black wig from a thrift store or repurpose an old wig. (Cost: $5 – $10)
- Clothing: Utilize an old, oversized dark-colored shirt and pants or a long, dark robe. (Cost: $0 – $5)
- Hair Extensions: Purchase inexpensive brown or black yarn from a craft store, or use old scraps of fabric or yarn from home. (Cost: $10 – $15)
- Makeup: Use existing makeup or purchase a basic brown eyeshadow palette for facial shading. (Cost: $0 – $5)
Total Estimated Cost: $15 – $30 This estimate assumes you already have some basic crafting supplies like scissors and glue.
Mid-Range Cousin Itt ($50 – $100)
This budget allows for higher-quality materials and a more polished look. You can achieve a more realistic and detailed Cousin Itt with this option.
- Wig: Purchase a high-quality, long, dark brown wig from a costume shop or online retailer. (Cost: $20 – $40)
- Clothing: Buy a dark-colored, comfortable robe or long-sleeved shirt and pants from a thrift store or discount retailer. (Cost: $10 – $20)
- Hair Extensions: Purchase higher-quality, thicker yarn or even faux hair extensions specifically designed for costume use. (Cost: $15 – $30)
- Makeup: Invest in higher-quality makeup for more detailed facial features and a more convincing look. (Cost: $5 – $10)
Total Estimated Cost: $50 – $100 This assumes you have basic crafting tools; additional costs may apply if you need to purchase glue guns, etc.
High-End Cousin Itt (Over $100)
This budget allows for the highest quality materials and a truly professional-looking costume. You can create a remarkably detailed and realistic Cousin Itt.
- Wig: Invest in a custom-made, high-quality wig from a specialized wig maker or a high-end costume shop. (Cost: $50 – $100+)
- Clothing: Purchase high-quality dark clothing from a department store or tailor-made clothing for a perfect fit. (Cost: $30 – $50+)
- Hair Extensions: Use high-quality faux hair or even real human hair extensions for a truly realistic look. (Cost: $50 – $100+)
- Makeup: Hire a professional makeup artist for detailed facial features and a convincing character transformation. (Cost: $50 – $100+)
Total Estimated Cost: $180 – $350+ This is a high-end option, so costs are subject to significant variation depending on specific material choices and labor costs.
Sourcing Materials
Materials for each budget option can be sourced both online and offline.
- Online: Amazon, eBay, Etsy, specialty costume shops, and wig retailers offer a wide variety of materials, from wigs and yarn to makeup and clothing.
- Offline: Thrift stores, fabric stores, craft stores (like Michaels or Hobby Lobby), costume shops, and department stores provide excellent options for sourcing materials at various price points.
Clarifying Questions
Can I use synthetic hair instead of yarn for the wig?
Yes, synthetic hair can be used, offering a potentially smoother, less textured look. However, it may be more expensive and less forgiving if you make mistakes.
How long does it take to make the costume?
The time commitment varies greatly depending on the chosen materials and complexity of the design. Expect to spend several hours, potentially spanning several days or even weeks.
What if I don’t have sewing skills?
Many aspects of this costume can be achieved with minimal sewing. Gluing and other fastening methods can be employed, depending on the materials used.
Where can I find vintage-looking fabrics?
Thrift stores, online marketplaces like eBay and Etsy, and fabric stores specializing in vintage or antique materials are good options.
